Different types of camping cookware will require different types of cleaning. If you’re looking for a short answer on how to clean camping cookware, then the best way to clean camping cookware is to use hot water and mild soap. If there are any stubborn stains or burnt-on food, you can use a scrub brush or a scouring pad. It’s important to avoid using abrasive cleaners or steel wool, as they can damage the non-stick coating on some cookware. After cleaning, make sure to dry your cookware thoroughly before storing it.

Why Clean Camping Cookware at All?
First things first, let’s talk about why it’s so crucial to keep our camping cookware clean. As we all know, the joy of camping is not just about hiking, fishing, or taking in the majestic views – it’s also about cooking delicious meals around the fire pit. You can’t have a great outdoor cooking experience with dirty pots and pans now, can you?
Dirty cookware doesn’t just look unpleasant; it’s also a potential health hazard. Lingering food particles can lead to bacteria growth, which is definitely something you want to avoid when you’re out in the wild. A clean cooking setup is the key to maintaining good hygiene practices while camping, ensuring that your food is safe to eat and delicious.
Plus, properly cleaned and maintained cookware lasts longer, saving you money in the long run. And let’s be honest, who doesn’t like cooking with nice shiny utensils? Remember, a clean camp is a happy camp, and that certainly extends to your cookware. So let’s dive in and get those pots and pans sparkling clean!
Essential Cleaning Tools for Camping Cookware
Whether you’re a weekend warrior or a seasoned camper, you know that packing light is the key to a successful outdoor adventure. This rule applies to your cleaning gear, too. You don’t need an entire under-the-sink arsenal to get the job done; just a few essentials will do the trick.
First up, a compact, durable scrub brush is your best friend. One with a good grip and strong bristles can handle most grime you’ll encounter. Bonus points if it has a scraper edge for tackling those stubborn, stuck-on bits. Next, a pack of biodegradable soap should be in your camping kit. This stuff works wonders and is environmentally friendly, so you won’t be leaving harmful residues behind in nature.
You’ll also want to have a few microfiber cloths on hand. These babies are lightweight, quick-drying, and excellent for wiping down and drying your cookware. For the tougher jobs, consider packing a small piece of stainless-steel wool. Just remember, it’s a no-go for your non-stick pans!
Lastly, don’t forget a couple of sturdy resealable bags. These are perfect for hauling away food waste and also storing your cleaning supplies.
Pre-Cleaning Tips: Before You Start Cooking
Before you start cooking, think about the type of food and how it might stick or burn on your cookware. If you’re using cast iron, a good preseason can go a long way. Rub a little cooking oil on the inside of your pan to create a natural non-stick surface. For other cookware types, a light non-stick cooking spray could do the trick.
Planning your meals can also help. For example, consider cooking dishes that leave less residue first, followed by the more stubborn ones. This way, you can use the same pot or pan with minimal cleaning in between.
Another helpful tip is to make sure you’re not cooking on too high heat, especially if you’re not sure how your cookware will react. A controlled flame can prevent food from burning and sticking onto your cookware, making it easier to clean later.
Finally, always have a small tub of water warming up on the fire while you’re eating. This way, when it’s time to do the dishes, you’ll have warm water ready to help cut through the grease.
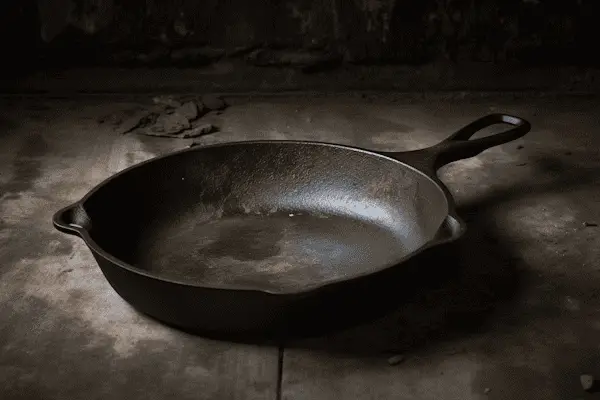
Step-by-Step Guide: Cleaning Cast Iron Cookware
Cast iron cookware is a popular choice among car campers. Here is how you should clean it.
Step 1: Let it Cool First things first, let your cast iron cookware cool down after cooking. You don’t want to plunge a hot pan into cold water; it can cause the iron to warp or crack. Patience is key here!
Step 2: Scrape Off Leftovers Once it’s cool to touch, scrape off any leftover food bits using your handy-dandy scraper or brush. Remember, be firm but gentle – you don’t want to damage the seasoning.
Step 3: Warm Water Wash Rinse the cookware with warm water. Hot tip: avoid using soap if you can. Soap can strip away the seasoning, the layer that gives your cast iron that non-stick magic.
Step 4: Brush Away Residue Using your scrub brush, gently brush away any remaining food particles. Again, no need to be too aggressive, you want to maintain the integrity of the seasoning.
Step 5: Rinse and Dry Rinse your cookware thoroughly, making sure to remove any loose particles. Now, dry it completely. This step is super important because leaving it wet can lead to rust. You can put it back on the fire for a couple of minutes to evaporate any lingering moisture.
Step 6: Re-season if Necessary If you’ve had to scrub particularly hard or if your pan looks a bit dull, it might be time to re-season. Just warm it up a little, apply a thin layer of cooking oil, and let it heat over the fire until it starts to smoke. Then, let it cool.
Step-by-Step Guide: Cleaning Stainless Steel Cookware
Cleaning stainless steel cookware doesn’t have to be a hassle. Here’s a step-by-step guide to make your stainless steel pots and pans shine like new.
Step 1: Let it Cool After cooking, allow your stainless steel cookware to cool. Similar to cast iron, a sudden temperature change could warp the material.
Step 2: Remove Leftover Food Once cooled, scrape off any food leftovers gently. A nylon scraper is a good tool for this, as it won’t scratch the surface.
Step 3: Soak in Warm Water Fill your pot or pan with warm water and let it soak for a bit. This helps to soften any stubborn food particles or burnt-on spots. If you’re out camping, you can set it aside while you enjoy your meal.
Step 4: Scrub Gently After soaking, use a scrub brush or sponge to clean the cookware. For stubborn stains, a paste made of baking soda and a little water works wonders. Just apply it to the stained area, let it sit for a few minutes, then scrub it off.
Step 5: Rinse and Dry Rinse thoroughly with clean water to remove all soap or cleaning residue. After rinsing, be sure to dry your cookware completely. Any leftover moisture could lead to water spots or rust. You can air-dry it or use a microfiber cloth to speed up the process.
Step 6: Polish (Optional) For an extra shine, you can polish your stainless steel cookware using a bit of vinegar or a special stainless steel polish. This step is not necessary for cleanliness, but it sure does make your cookware look pretty.
Step-by-Step Guide: Cleaning Non-stick Camping Cookware
We all love how easy non-stick cookware is to cook with, but cleaning it requires a little extra care to maintain that non-stick surface.
Step 1: Cool Down Similar to other types of cookware, it’s essential to let your non-stick pan cool down before starting the cleaning process. This prevents warping and preserves the lifespan of your pan.
Step 2: Remove Loose Food Particles Once it’s cool, gently remove any loose food particles. Non-stick surfaces can be delicate, so avoid using metal utensils or harsh scrubbers that can scratch the surface. A soft dishcloth or sponge is perfect for this job.
Step 3: Soak if Necessary If there’s stubborn residue, fill your pan with warm water and let it soak for a while. A 15-minute soak should be enough to loosen up any stuck-on food.
Step 4: Gentle Cleaning After soaking, use a soft sponge or cloth to clean your cookware. If needed, a bit of mild soap can be used. Avoid abrasive cleaners or scrubbers – they can damage the non-stick surface.
Step 5: Rinse and Dry Next, rinse the cookware thoroughly with clean water. Once rinsed, dry it right away to prevent water spots. A quick towel-dry or a moment on the fire to evaporate the water should do the trick.
Step-by-Step Guide: Enamel Cookware
Enamel cookware is a popular choice for camping due to its durability and heat retention. However, it requires some special attention when cleaning to keep it in top shape.
Step 1: Cool it Down As with other types of cookware, it’s crucial to allow your enamel cookware to cool down after use. This helps prevent thermal shock, which can cause cracking or chipping of the enamel.
Step 2: Remove Leftover Food Once cooled, dispose of any leftover food. Remember, enamel can be scratched, so be sure to use a plastic or silicone utensil.
Step 3: Soak if Needed For stubborn food particles or stains, fill the cookware with warm water and let it soak. This will help loosen any stuck-on food and make cleaning easier.
Step 4: Gentle Cleaning After soaking, use a soft sponge or cloth to clean the cookware. You can use mild soap, but avoid harsh cleaning agents as they can dull or scratch the enamel surface.
Step 5: Handle Stains Carefully If you have tough stains, make a paste from baking soda and water and apply it to the stained areas. Let it sit for a few minutes and then gently scrub. Do not use metal scrubbers or harsh abrasive cleaners, as they can damage the enamel.
Step 6: Rinse and Dry Thoroughly rinse the cookware with clean water, ensuring all soap and residue is removed. Then, dry it well to prevent water spots and potential rust on any exposed iron areas.
Step 7: Check for Chips After cleaning, take a moment to inspect your cookware for any chips in the enamel. If you find any, you may want to retire the cookware piece from your camping kit, as the exposed cast iron could rust.
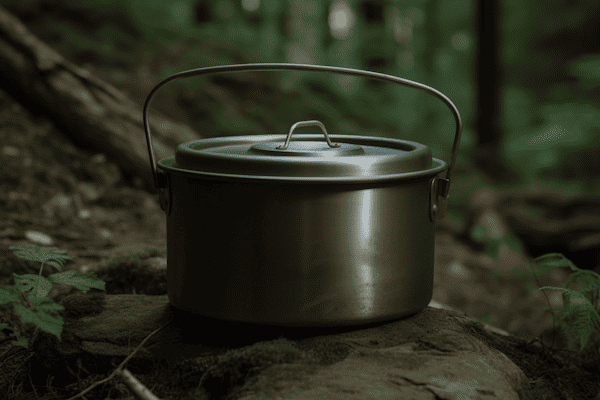
Step-by-Step Guide: Titanium Cookware
Renowned for its super light weight and high durability, titanium cookware is a favorite among backpackers and hikers. Plus, it’s a breeze to clean if you follow these steps.
Step 1: Cool it Down As always, allow your titanium cookware to cool down after use. This is less about damage to the cookware – titanium is exceptionally heat-resistant – and more about your safety.
Step 2: Remove Excess Food Once it’s cooled, dispose of any leftover food. A soft silicone or nylon spatula works great for this, ensuring you don’t scratch the surface.
Step 3: Rinse with Water Rinse your cookware with water. Warm water will work best, especially for greasy residue. One of the advantages of titanium is that food and debris usually don’t stick too hard, so a rinse often does the trick.
Step 4: Light Scrub if Needed If food residue persists after rinsing, a quick scrub should take care of it. Use a soft sponge or cloth – nothing too abrasive as it might scratch the surface. A little bit of mild soap can be used if necessary.
Step 5: Rinse and Dry After cleaning, rinse your cookware thoroughly to ensure all soap and food residues are gone. Then, dry it off to avoid water spots. One of the perks of titanium is its quick drying time, so this shouldn’t take long!
Special Care for Wooden and Silicone Utensils
We’ve talked about cleaning cookware, but what about the tools we use with them? Wooden and silicone utensils are common companions in our camping kits, and they deserve the right care too.
Wooden utensils are fantastic for camping – they’re durable, don’t scratch your cookware, and they even add a certain rustic charm to your outdoor cooking. However, they can absorb flavors and colors, so cleaning them properly is crucial. After use, scrub them with warm water and mild soap, then rinse thoroughly. Avoid soaking them in water, as prolonged moisture can cause wood to crack. Dry them immediately and thoroughly after cleaning. If they start to feel rough, a little food-grade mineral oil rubbed into the wood can bring them back to life.
Silicone utensils, on the other hand, are resilient and easy to clean. The non-porous material doesn’t absorb flavors or colors, which is a big plus. For cleaning, just rinse in warm water, use a little soap, and scrub off any residue. They’re typically safe to soak, unlike their wooden counterparts, and many are even dishwasher-safe if you’re lucky enough to have one of those on your camping trip! Just like with your cookware, make sure they’re thoroughly dried before storing them to keep them in the best condition.
Whether you’re a fan of traditional wooden utensils or prefer modern silicone ones, proper cleaning and maintenance can extend their life and effectiveness. So, give them a little love, and they’ll keep serving you well on many more camping trips to come!
Dealing with Tough Stains and Burnt Food Residues
Cleaning cookware is pretty straightforward until you encounter those pesky tough stains and stubborn burnt-on food. But don’t worry, there are effective ways to tackle them without causing damage to your precious camping gear.
When dealing with burnt-on food, patience is key. The first step is soaking your cookware in warm water to loosen the residue. You can add a squirt of mild dish soap to help dissolve the grease. Let it soak for a while – anywhere from 15 minutes to a couple of hours depending on how stubborn the food residue is. Then, try to gently scrape off the food using a non-abrasive scraper or brush. For non-stick and enamel cookware, be extra gentle to avoid scratching the surface.
For those nasty dark stains that just won’t budge, try using a mixture of baking soda and water. This natural cleaner works wonders on most types of cookware. Apply the paste to the stained area, let it sit for a few minutes, then scrub gently with a soft brush or cloth. Rinse well afterward to remove any baking soda residue.
One thing to remember when dealing with tough stains and burnt food is never to use harsh cleaning materials like steel wool or abrasive cleaners. They can scratch and damage your cookware.
Vinegar can also be a handy tool in your cleaning arsenal. Its acidity can help to dissolve tough stains, particularly on stainless steel and enamel cookware. Soak the stained area in a mixture of equal parts vinegar and water, then scrub gently.
Above all, the best way to deal with tough stains and burnt food is to prevent them from happening in the first place. Keep a close eye on your food while it’s cooking, regulate your heat source, and clean your cookware promptly after use.
Natural Cleaning Agents: An Environmentally-Friendly Approach
When you’re out in nature, it’s best to avoid synthetic detergents or cleaning products that could harm the environment. Thankfully, there are several natural alternatives that can get your cookware just as clean.
One of the most versatile natural cleaning agents is baking soda. It’s a mild abrasive that’s great for scrubbing off tough, burnt-on food, and it also helps to neutralize odors. You can make a paste with baking soda and a little water, then apply it to stained or burnt areas. Let it sit for a bit, then scrub gently and rinse well.
Vinegar is another natural cleaner that’s especially good for removing dark stains and discoloration. You can mix equal parts vinegar and water, soak your cookware in the solution, then scrub and rinse. Just remember that vinegar can be quite potent, so it’s best not to use it on cast iron or stone cookware, as it can damage the seasoning or the surface.
If you’re in a pinch and didn’t bring any cleaning agents, even sand or gravel can serve as a natural abrasive to clean your cookware. Just add a little water to create a paste, then scrub gently.
When using any cleaning agents, natural or not, always be mindful of where you’re disposing of your rinse water. Try to do your cleaning at least 200 feet away from any water sources to protect aquatic life.
By using natural cleaning agents, you’re not only caring for your camping cookware, but you’re also showing respect for the environment. After all, a clean campsite and healthy nature go hand in hand for the best outdoor experience!
How to Dry and Store Your Camping Cookware Properly
Let’s wrap things up by talking about storage and maintenance. After all, taking care of your camping cookware doesn’t stop once it’s clean – how you store and maintain it can make a big difference in its lifespan and performance.
When it comes to storage, the most important thing is to make sure everything is completely dry before you pack it away. Even a small amount of moisture can lead to mold, mildew, or rust, especially if your cookware will be stored for a while before your next adventure. If you’ve used a campfire to dry your cookware, make sure it’s cooled down before storing it.
For most types of cookware, a cool, dry place is the best storage location. Keep your cookware and utensils in a breathable bag to prevent dust and dirt from accumulating. Cast iron cookware benefits from a light coating of oil before storage to maintain its seasoning and prevent rust.
In terms of maintenance, routine check-ups can go a long way. Look for any signs of damage like dents, scratches, or chips, particularly in enamel and non-stick cookware. Also, check for any signs of rust, especially on cast iron items. Rust can be removed with a mixture of baking soda and water and a bit of scrubbing.
Lastly, remember that the key to long-lasting camping cookware is respectful use. Even the most durable cookware can be damaged by misuse, so always use the appropriate utensils and cleaning methods, avoid drastic temperature changes, and follow any specific care instructions provided by the manufacturer.
By taking a little time to properly clean, store, and maintain your camping cookware, you’re investing in many more enjoyable meals on your future outdoor adventures.