Outdoor gear often comes with taped seams but what exactly are taped seams?
Taped seams are a type of seam used in clothing and outdoor gear that involves sealing the stitching with waterproof tape. This helps to prevent water from seeping through the seams and keeps the wearer dry in wet conditions. Taped seams are especially important in rain jackets, tents, and other outdoor gear where water resistance is crucial.

Taped Seams 101: Diving into the Basics
So, you’ve heard the term ‘taped seams’ floating around and you’re curious about what it’s all about. Great! You’ve come to the right place. Taped seams are one of those little-known, yet hugely impactful elements in many of our daily lives. But before we delve too deep, let’s start with the basics.
A seam, simply put, is where two pieces of material – usually fabric – come together. Now, in the perfect world, this join would be utterly waterproof, but unfortunately, that’s not always the case. This is where taped seams come in. They work as the knight in shining armor, stepping up to bolster those seams, making them both more durable and water-resistant.
Taping seams is a process that involves applying a thin strip of waterproof tape over the seam, sealing the tiny holes created during the sewing process. This essentially creates a barrier, preventing water from sneaking through. But it’s not just about being a barrier against water; taped seams also add strength to the joined materials, reducing wear and tear and making your stuff last longer.
Behind the Scenes: The Fascinating Science of Taped Seams
Now that we’ve got the basics down, let’s delve a little deeper. You might be thinking, “It’s just a bit of tape on fabric, how complex can it be?” Well, prepare to be amazed because the science behind taped seams is surprisingly intricate.
The world of taped seams revolves around some pretty nifty chemistry and physics. The tape used isn’t your everyday sticky tape; it’s a special adhesive film that bonds with the fabric when heated. Think of it like a more sophisticated version of those iron-on patches you might have used to fix a hole in your jeans.
This adhesive is activated by heat – a process called thermoadhesion. During the process, the adhesive melts and permeates the fibers of the fabric, creating a strong bond that’s not just resistant to water but also to stress and strain. The goal here is to create a seal that is as strong as, if not stronger than, the material itself.
And it’s not just any fabric that will do. The fabrics used with taped seams are usually synthetic – think nylon or polyester – because these materials can withstand the heat needed to activate the adhesive. Plus, they often have their own water-resistant qualities, making them the perfect partners in crime for adhesive tape.
Breaking Down the Materials: A Closer Look at the Fabric and Adhesives in Taped Seams
Okay, so we’ve covered what taped seams are and the science behind them. But what about the materials used? The fabrics and adhesives play a huge role in how effective and durable the taped seam is. So, let’s pull back the curtain and see what’s really going on.
The fabric used in conjunction with taped seams is typically something robust and synthetic, like nylon or polyester. Why? Well, these types of fabrics are tough, which makes them perfect for outdoor gear and architectural structures. Plus, they can handle the heat needed to activate the adhesive tape – without melting or warping – and they often have their own water-resistant properties.
Now, on to the star of the show: the adhesive. This isn’t your garden-variety sticky tape. This is a specialized heat-activated adhesive that forms a strong bond with the fabric, sealing the seam and making it waterproof and durable. Some common types include polyurethane (PU) and polyvinyl chloride (PVC) tapes.
The tape typically has three layers: an adhesive layer that bonds with the fabric, a middle layer that gives the tape its structure, and a top layer that provides extra waterproofing and durability. All three work together to create a seal that’s tough, waterproof, and ready to withstand the elements.
The Art of Seam Taping: Techniques and Applications
Alright, let’s roll up our sleeves and dig into the craft of seam taping. There’s a whole art to applying taped seams, and getting it right can mean the difference between a product that’s waterproof and one that, well, isn’t.
The process begins right after two pieces of fabric are sewn together. This creates a seam, and while the seam holds the fabric together, it’s also the weakest point for water to seep through. That’s where seam taping comes in. A strip of specialized tape is applied directly over the seam, using heat and pressure to bond it firmly to the fabric.
Now, this isn’t something you just slap on and hope for the best. Applying taped seams is a delicate balancing act. Too much heat, and you risk damaging the fabric. Not enough heat and the adhesive won’t fully bond with the fabric. It’s a bit of a Goldilocks situation, and getting it just right is crucial.
The actual process can vary a bit depending on the materials used and the product being made. For example, outdoor gear like jackets and tents may have their seams taped by hand to ensure precision, while larger architectural structures may use a machine for efficiency.
Despite these differences, the goal is always the same: to create a waterproof and durable seam that stands up to the elements and the test of time. So, next time you’re out in the rain, snug and dry in your waterproof jacket, spare a thought for the art and skill that’s gone into those little taped seams. Pretty cool, right?
Seam Taping in the Outdoor Industry: Upholding Weather Resistance in Gear and Apparel
So, where exactly are these taped seams we’ve been talking about? Well, if you’re an outdoorsy type, chances are you’ve used equipment with taped seams without even knowing it. Let’s explore how taped seams make our adventures in the great outdoors even greater.
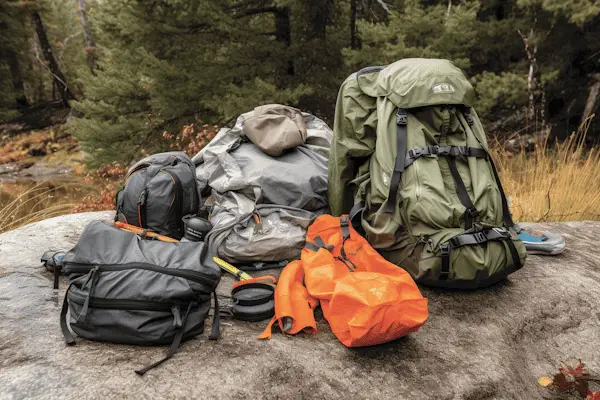
Take a look at your outdoor clothing and gear – waterproof jackets, tents, hiking boots, and even dry bags. See those smooth lines running along the seams? That’s seam taping at work. Outdoor gear manufacturers are big fans of taped seams because they know that when you’re out braving the elements, the last thing you want is water seeping in through the seams of your gear.

In outdoor apparel, taped seams keep you dry and comfortable, no matter how heavy the rain is pouring or how hard the snow is falling. They can make the difference between a miserable, soggy day on the trail and a dry, comfortable adventure.
And when it comes to tents, taped seams can be the difference between a cozy night’s sleep and a wet, chilly disaster. They keep the water out, ensuring your tent stays dry even in heavy rain or snow.
Similarly, other gear like dry bags and hiking boots also benefit from taped seams, keeping your stuff dry and secure.
DIY Corner: A Beginner’s Guide to Applying Taped Seams at Home
Ever considered trying your hand at applying taped seams yourself? Well, you’re in luck! With a little patience, the right tools, and this beginner’s guide, you could be on your way to becoming a pro at taping seams. Whether you’re fixing a leaky tent or making your own outdoor gear, here’s how to get started.
First things first, you’re going to need some seam tape. There are a few types available, so make sure to choose one that’s suitable for the fabric you’re working with. You can usually find seam tape at fabric stores or online.
Next up, you’ll need an iron. That’s right, the same iron you use to press your shirts. This is what you’ll use to apply heat to the seam tape and bond it to the fabric. Make sure to check the instructions on your seam tape for the correct heat setting to use.
Now, onto the process. Start by laying your fabric flat and placing the seam tape over the seam, adhesive side down. Apply heat with your iron, pressing down firmly and moving slowly along the seam. The heat will activate the adhesive on the tape, bonding it to the fabric.
Once you’ve finished, let the fabric cool down. The adhesive needs a bit of time to set properly. Then, check the seam to make sure the tape is firmly attached. If there are any loose spots, simply reapply heat with the iron until the tape is secure.